Configure activity request settings in WFM
Create and manage activity request settings to empower agents to schedule activities outside of their assigned shifts. With this feature, agents can request time slots for activities such as training, administrative tasks, or skill-building opportunities directly from MyTime.
Prerequisites
-
This feature is available for Cloud customers only.
- You have the Super administrator role.
-
The agents must have the MyTime > Activity requests permission.
-
The agents must have a scheduled shift on their calendar. If the calendar is empty, the agent will not be able to submit an activity request.
Page location
WFM > WFM settings > Activity request settings
Procedures
Create a new rule for the activities
- Click Create activity rule. The New activity rule window opens.
-
Create a new activity rule with the following details:
-
Enter a name for the activity in the Enter rule name field.
-
From the Approval method drop-down list, select one of the following:
-
Check staffing - Approve or deny the request based on staffing availability for the agent’s underlying activity.
NOTE The Check staffing control checks whether approving the request would leave the agent’s original activity (and its associated skill or skills) under scheduled. It does not consider staffing for the requested activity or whether the requested activity would become over scheduled. Currently, the control set used by this feature is Intraday.
EXAMPLE If an agent requests time off, the system checks whether removing them from their current assignment (such as "Inbound Calls") would negatively impact staffing coverage for that activity.
-
Always approved - Automatically approve the activity in the agent’s schedule.
-
Manual approval - Send the request to the manager for approval.
-
Check staffing with shrinkage - Approve or deny the request based on whether the agent’s original activity will remain sufficiently staffed after accounting for shrinkage (expected agent unavailability such as absences, breaks, meetings, and other non-skill time). See Shrinkage for detailed information.
-
-
From the Applicable drop-down list, select one of the following:
-
Always - The agent can request changes to an activity even after the activity has started and requests can be approved retroactively.
When selected, enter the following:
-
Enter a value in the Max days back to change activity field.
-
Enter a value in the Max days forward to change activity field.
-
Enter a value in the Max activity duration in minutes field to limit the length of the activity the agent can request.
-
-
Only before start - The agent can request changes to an activity only before the intended start time of the activity.
When selected, enter the following:
-
Enter a value in the Minutes before start field.
-
Enter a value in the Max days forward to change activity field.
-
Enter a value in the Max activity duration in minutes field to limit the length of the activity the agent can request.
-
-
- Click Save.
-
Once saved, the rule appears under Your current rules with Edit and Delete (trash icon on the left) options.
-
Click Edit to modify the rule.
-
Click the trash icon to delete it.
-
Apply the rule to the activities
-
Click the Activity rule assignment tab and assign a rule to each activity type.
NOTE For each activity, you can choose one or multiple rules that can be assigned to one or multiple teams. However, only one rule can be assigned for the same activity and team.
-
Expand the desired activity section.
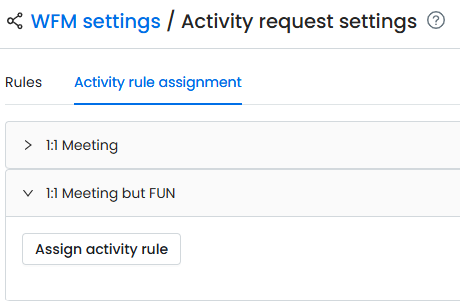
-
Click Assign activity rule. The Activity rule assignment window opens.
-
In the Activity rule assignment window:
-
Select an activity rule from the Select activity rule drop-down list.
-
Choose one or more teams from the Select teams field.
-
-
Click Save.
Edit team selection for an assigned rule
-
Expand the desired activity section.
-
Click Edit team selection. The Activity rule assignment window opens.

-
Update the teams as needed.
-
Click Save.
-
To delete the rule assignment, click the trash icon on the left.
Related topics